

Using Logic X Smart Controls with Spectrasonics Instruments follows the same method for enabling host automation.
1. Add your Spectrasonics instrument to your Logic X project.
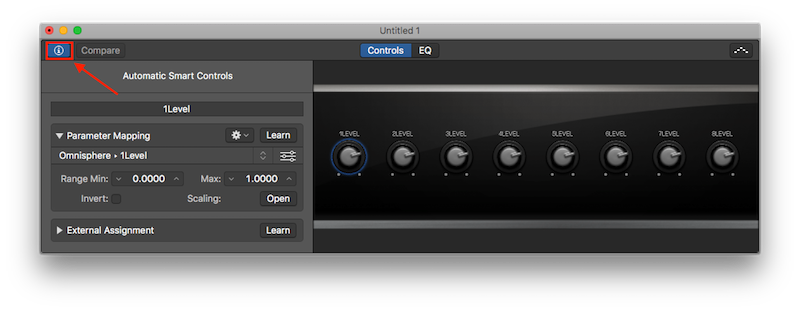
2. From Logic X's Window menu select "Open Smart Controls." Ensure the inspector ("i") icon is turned 'on.' The default mapping displayed is for Omnisphere/Trilian's eight Part Level controls.
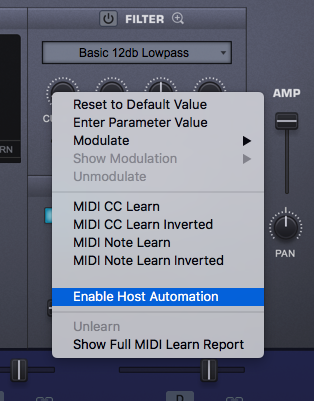
3. To add a new control, open the instrument interface, right-click the desired parameter, then select "Enable Host Automation."
Note: Stylus RMX Xpanded has a slightly different host automation setup. You must select Utility Menu (floppy disk, bottom-left corner) > MIDI Learn > Enable Host Automation and then move the parameter you want to automate.
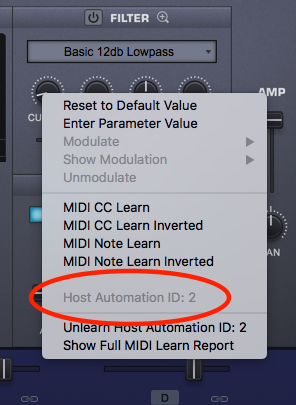
A Host Automation number will be assigned to that parameter (in this example, the Filter Cutoff for Layer A of Part 1).
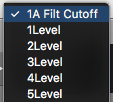
4. On the Smart Controls window, select the desired Smart Control knob, then select 'Parameter Mapping' - from the list, select the relevant instrument Parameter (in this example, the Filter Cutoff for Layer A of Part 1).
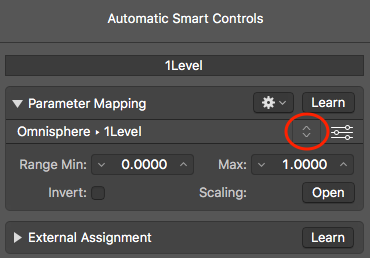
5. On the Smart Controls window, the newly-assigned parameter name will appear above the designated Smart Control.
